Kitchen Painting and Finishing
Kitchen painting and finishing updates cabinets, walls, and ceilings with durable coatings that handle heat, moisture, and daily wear. The process includes cleaning, sanding, priming, and applying multiple finish coats for a smoother, longer-lasting surface.
Satin and semi-gloss paints improve cleanability and extend lifespan, offering an affordable upgrade compared to full replacement.
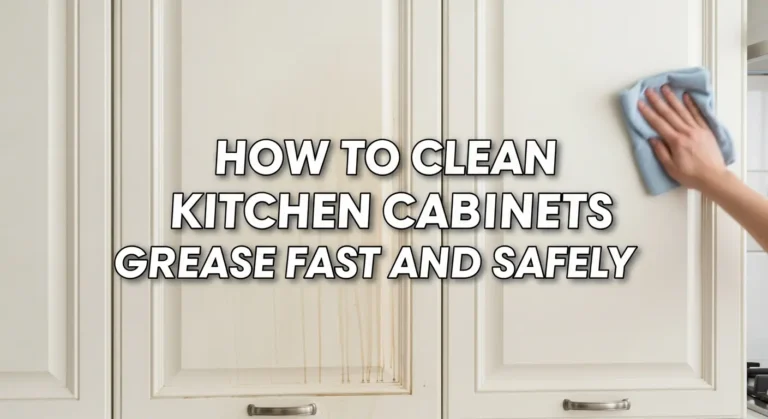
Before painting, thoroughly degrease and prep your surfaces—our guide on how to clean kitchen cabinets fast and safely covers the best methods.
Key Facts:A quick snapshot of what homeowners usually care about most when planning a kitchen painting project.
- Cabinet paint lifespan: High-quality finishes typically last 7 to 10 years with proper prep.
- Cost savings: Repainting cabinets instead of replacing them can cut spending by about 60 to 70 percent.
- Pro timeline: Most professional teams finish in 2 to 3 days, with full curing taking 5 to 7 days.
- Finish durability: Satin and semi-gloss coatings offer around 40 percent better moisture resistance than matte.
- Indoor air safety: Low-VOC and zero-VOC products can reduce indoor toxin levels by up to 90 percent.
- Typical California pricing: Cabinet painting generally falls in the $4,000 to $6,500 range, depending on kitchen size and materials. These figures are estimates, as project costs vary and may differ based on partner service providers.
Smart finishing choices—like satin or semi-gloss—help resist moisture and wear, lasting 7–10 years with proper prep. It’s not just about color—it’s about function, value, and keeping your kitchen easy to maintain.
👉 Refreshing your kitchen in Chula Vista? Vexkitch offers expert painting and finishing backed by 700+ successful projects.
What is Kitchen Painting and Finishing?
Kitchen painting and finishing refreshes walls, ceilings, and cabinets with durable coatings that resist heat, moisture, and grease.
Using satin or semi-gloss finishes extends surface life up to 10 years while keeping the kitchen easy to clean and stylish, an affordable upgrade compared to a full remodel.
Proper lighting can showcase your fresh paint finish, see our lighting and fixtures tips to enhance your kitchen’s ambiance.
Choosing the Right Paint Finish
The finish you choose affects how your kitchen handles heat, grease, and daily wear.
✅ Recommended Finishes:
| Surface | Best Finish | Why It Works |
|---|---|---|
| Walls | Satin | Easy to clean, low-shine, durable |
| Ceiling & Trim | Semi-gloss | Moisture-resistant, wipes clean |
| Cabinets | Semi-gloss / Satin | Tough, smooth, resists chipping |
Skip matte, it stains easily and doesn’t clean well.
Use enamel, waterborne alkyd, or urethane-based paints on cabinets for added durability.
Performance Facts:
- Satin and semi-gloss finishes outperform matte by up to 40% in moisture resistance (Consumer Reports, 2024).
- Acrylic enamel and alkyd paints form a hard, washable surface ideal for high-traffic kitchens.
- For better indoor air quality, opt for low-VOC or zero-VOC paints certified by the EPA Safer Choice program.
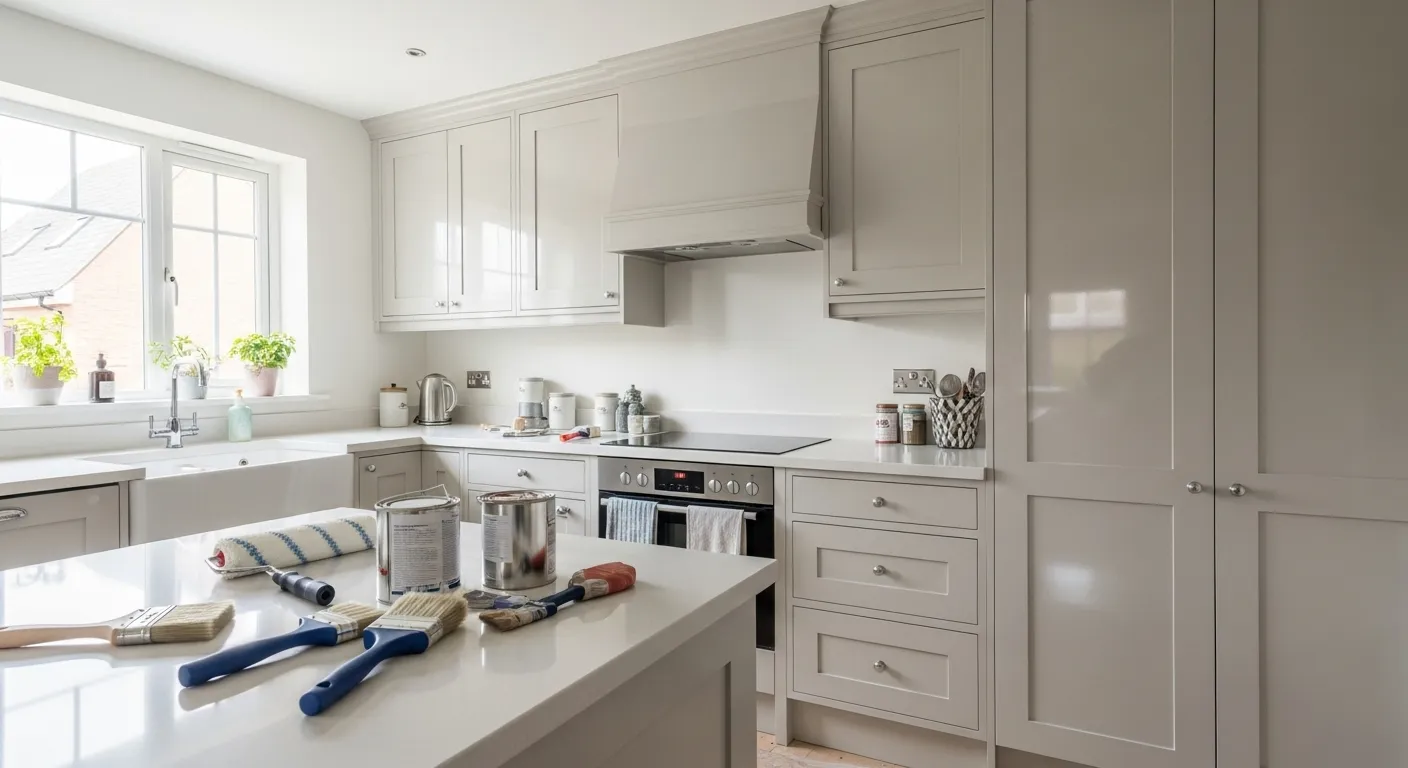
Tools & Materials Checklist
Paint quality matters—but so does your gear.
Essentials:
- Primer (bonding or stain-blocking)
- Cabinet-grade paint
- Angled brushes, foam rollers
- Sandpaper (120–220 grit)
- Degreaser (e.g., TSP)
Nice-to-Haves:
- Paint sprayer
- Tack cloth
- Door risers
- Gloves + mask for safety
Integrating technology into your kitchen can complement your new finishes—explore ideas in our smart kitchen integration guide.
Prep Work Basics
Prepping right prevents peeling, blotching, and brush marks.
Quick Steps:
- Remove & label cabinet doors and hardware
- Degrease all surfaces—paint won’t stick to kitchen grime
- Sand lightly to improve adhesion
- Fill holes, then wipe clean with a tack cloth
A clean, smooth surface is the backbone of a long-lasting finish.
Priming Like a Pro
Primer isn’t just an extra step—it’s the glue that holds your paint in place. It seals old surfaces, blocks stains, and helps prevent mold in humid kitchens.
- Oil-based primers: Great for sealing knots, old varnish, and tough stains
- Stain-blocking primers: Stop discoloration from bleeding through paint
- Bonding primers: Help paint stick to glossy or slick surfaces like laminate
Choosing the right primer ensures your paint job lasts longer and looks flawless.
Painting Process: Walls & Ceiling
Smooth, even walls start with solid technique.
- Cutting-in: Use angled brushes to paint edges and corners carefully
- Rollers: Use a high-density foam roller for even application on walls
- Back-rolling: Go over freshly rolled areas lightly to avoid lap marks
Let each coat dry fully—usually 2–4 hours—before applying the next. Ideal conditions are moderate temperature and low humidity.
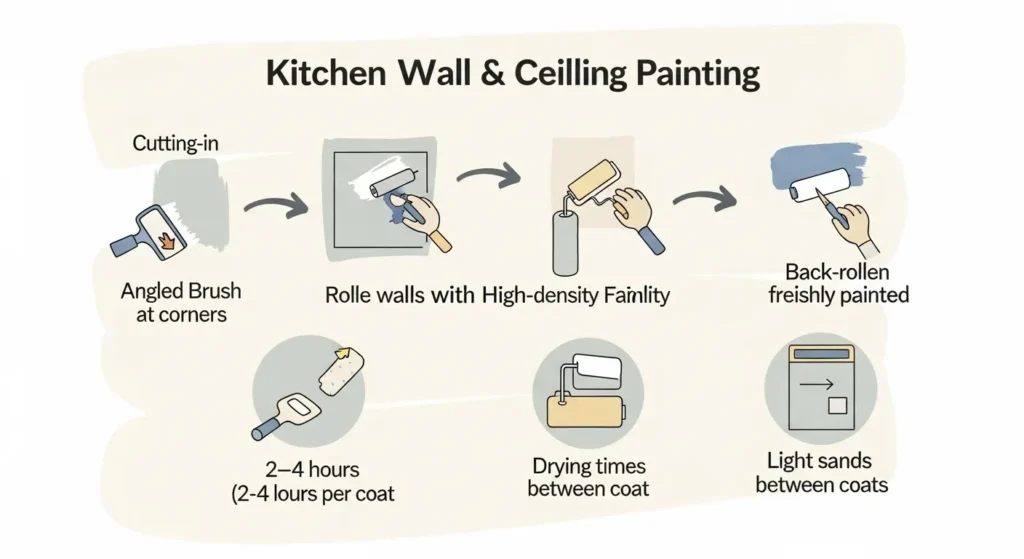
Watch for drips, brush marks, or lap lines. Light sanding between coats fixes imperfections and smooths the finish.
Painting Kitchen Cabinets
A cabinet paint job calls for patience and precision:
- Remove and label doors, drawers, and hardware to avoid confusion
- Clean and sand thoroughly for good paint adhesion
- Prime with oil-based primer if sealing raw wood or over old finishes
- Sand lightly between coats to keep surfaces smooth
- Apply 2–3 finish coats using brushes, rollers, or a sprayer
- Reassemble only after the paint fully cures—usually 5–7 days for best durability
Drying times between coats typically range from 24 to 48 hours depending on paint type and environment.
Choosing the right cabinets and countertops pairs perfectly with a quality paint job—learn more in our custom cabinetry and countertops resource.
Avoiding Regrets & Common Pitfalls
Skipping primer, rushing the job, or not labeling parts can turn a fresh paint job into a frustration. Common regrets include chipping paint, uneven shine, and mix-ups during reassembly.
Key takeaways:
- Label all cabinet pieces clearly
- Give paint time to cure fully before use
- Choose quality primers and paints—cutting corners costs more in fixes
Cost & Time Estimates
Budgeting smart keeps surprises at bay.
- DIY materials: $200–$1,000 depending on kitchen size and paint quality
- Professional services: $4,000–$6,500 for cabinets plus extras for walls/ceilings
- Timeline: Pros take 2–3 days; DIYers should expect 1+ weekends, with up to a week for full curing
Real-World Cost Insights & ROI
According to HomeAdvisor and Remodeling Magazine (2025), painting cabinets instead of replacing them saves homeowners 60–70% on average renovation costs. Professional-grade finishes typically cost $4,000–$6,500 in California, depending on kitchen size and materials. The return on investment (ROI) for cabinet repainting averages 65–75%, making it one of the most cost-effective kitchen updates available.
Aftercare & Maintenance
In the first week after painting, steer clear of heavy scrubbing or harsh cleaners to protect your fresh finish.
Keep a touch-up kit nearby—basic essentials like matching paint and a small brush make quick fixes easy and keep your kitchen looking sharp longer.
Maintenance Made Easy
| Task | When | Why It Matters |
|---|---|---|
| Light cleaning only | First 7 days | Protects curing paint |
| Use mild soap & soft cloth | Weekly | Keeps the sheen even |
| Avoid abrasive sponges | Always | Prevents dulling or scratching |
| Touch up small chips | As needed | Keeps surfaces looking new |
| Inspect caulking & edges | Every 6 months | Prevents moisture intrusion |
Local Trust Boosters
Showcase real professional tours and before/after photos to highlight quality work.
With over 700 satisfied clients and 8+ years serving Chula Vista, Vexkitch brings trusted local experience.
Featuring verified reviews, industry certifications, and solid warranties, Vexkitch stands behind every project with confidence.
FAQs
About the Author – Alex Lina
Alex Lina is the founder of Vexkitch Kitchen Remodeling, serving Chula Vista and surrounding areas. With 8+ years of experience and 700+ completed kitchen projects, Alex specializes in modern design, functional remodeling, and high-durability finishing. His team combines local expertise with premium craftsmanship to help homeowners reimagine their kitchens with confidence.
Case Study: How a Chula Vista Family Saved 65% With a Cabinet Refinish
A local family in east Chula Vista wanted a cleaner, brighter kitchen without committing to a full renovation. Their maple cabinets were structurally solid but yellowed from years of cooking. A full replacement was estimated at around $14,000, which pushed them toward repainting instead.
What we did:
- Deep degreasing and sanding
- Bonding primer for better adhesion
- Three finish coats of satin enamel
- Updated hardware and soft-close hinges
- Light caulking around trouble spots for a seamless look
Results:
- Total project cost landed near $4,800 (estimated)
- Timeline: 2½ days, with a full cure at 5–7 days
- Expected paint lifespan: 7–10 years
- Cost reduction: roughly 65% compared to replacement
- Kitchen looked noticeably brighter, with improved light reflection due to a higher-LRV finish
This kind of project shows how repainting can stretch a budget while still delivering a dramatic visual transformation. For many homes in Chula Vista, cabinet refinishing offers strong value without the downtime or cost of a full remodel.
Mistakes to Avoid When Hiring a Painter
Hiring the wrong painter can turn a simple kitchen refresh into a headache. Homeowners often run into the same avoidable issues, especially when cabinets are involved. These points help filter out unreliable providers and protect the quality of your finish.
1. Skipping a Written Scope of Work
A clear outline should list prep steps, primer type, finish coats, drying times, and cleanup. Without it, expectations get blurry and results vary.
2. Not Asking About Cabinet-Specific Experience
Cabinet painting is closer to refinishing than wall painting. A painter who mostly handles interiors may not know how to sand, spray, or cure enamel properly.
3. No Sample or Test Area
Professionals typically provide a small sample board or test section. It shows color accuracy, sheen, and finish quality before the full job starts.
4. Ignoring VOC and Safety Practices
A reputable painter explains which products they use and why. Low-VOC or zero-VOC paint keeps indoor air safer during and after the project.
5. Choosing Solely by Lowest Price
Cheaper quotes often skip sanding, bonding primer, or extra coats. These shortcuts lead to peeling, uneven sheen, or early wear—costing more to fix later.
6. No Timeline or Cure Schedule
Paint might dry in hours, but curing can take days. A painter should provide an estimated timeline including prep, coats, and when cabinets can be reassembled.
7. Lack of Before/After Portfolio
Photos reveal consistency. Look for clean edges, smooth cabinet doors, and even finishes. Uneven texture or visible brush strokes are red flags.
8. Not Checking Reviews in Your Area
Local reviews help identify patterns: punctuality, cleanup habits, finish durability, and customer communication. This is especially helpful in neighborhoods with older cabinets or heavy kitchen use.
Hiring a painter who communicates clearly and details each step helps ensure a smoother project and a longer-lasting finish. Ready for the next missing section?
For expert guidance and a hassle-free project, request a free kitchen remodeling quote from our Chula Vista team.
AI Color Tools & Smart Planning Helpers
Modern color selection goes far beyond paint swatches. Homeowners often turn to AI tools to visualize finishes, compare palettes, and preview sheen differences before lifting a brush. These tools help avoid second-guessing by showing how colors shift under kitchen lighting, backsplash materials, and countertop tones.
Color Matching With LLM Tools
Large language models, like ChatGPT, Gemini, and DeepSeek, can generate curated color palettes based on the style of your kitchen, from coastal whites to rich earth tones. They analyze trends, LRV values, and finish durability to suggest options that hold up well in high-moisture spaces.
Virtual Before-and-After Previews
Some apps use AI to simulate:
- How satin vs. semi-gloss looks on cabinets
- How warm or cool lights change a color
- How paint interacts with stainless steel or matte black appliances
This helps avoid costly do-overs and reduces the risk of choosing the wrong shade.
Smart Recommendations for Resale Value
Tools like Bing Copilot and Perplexity can identify colors that consistently perform well in real estate listings. Soft whites, muted grays, and natural wood tones typically rank highest for resale appeal, especially in California markets.
Palette Testing With Real Kitchen Photos
Most AI tools let you upload a photo of your actual kitchen. They then apply your chosen colors digitally so you can compare multiple looks side-by-side. It’s an easy way to confirm whether a color works with your existing flooring, counters, or backsplash.
Why This Matters
Color choice affects lighting, maintenance, and long-term satisfaction. Using AI tools reduces the guesswork and helps dial in a finish that looks good in both natural daylight and artificial lighting. It’s a quick upgrade to your planning process that prevents regret later.
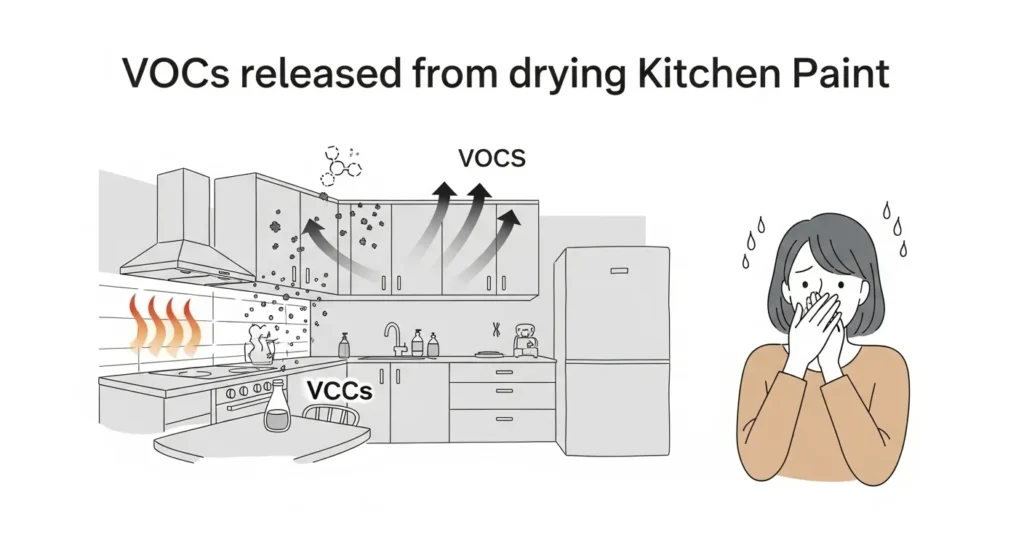
VOC & Indoor Air Safety
Paint quality affects more than appearance. The products used in kitchens also influence indoor air, odor levels, and long-term health. Understanding VOCs, or volatile organic compounds, helps you choose coatings that perform well without compromising comfort.
What VOCs Do
VOCs are chemicals that evaporate as paint dries. Higher levels contribute to stronger odors and can irritate eyes, throat, or sinuses. Kitchens see more heat and moisture, which can speed up VOC release, making product choice even more important.
EPA – Volatile Organic Compounds’ Impact on Indoor Air Quality
Low-VOC and Zero-VOC Options
Modern low-VOC and zero-VOC paints significantly reduce airborne pollutants. Many brands cut VOC levels by up to 90 percent, which helps keep indoor air cleaner during and after the project. These products still offer strong adhesion and durability, especially in satin and semi-gloss finishes.
Why This Matters in Kitchens
Cooking steam, heat, and tight spaces can trap lingering odors. Using safer paint reduces that buildup while keeping maintenance simple. It’s especially helpful in homes with kids, pets, or anyone with sensitivities.
Primers That Support Better Air Quality
Some bonding and stain-blocking primers include low-VOC formulas. Selecting these helps maintain air quality across every step of the finishing process, not just the topcoat.
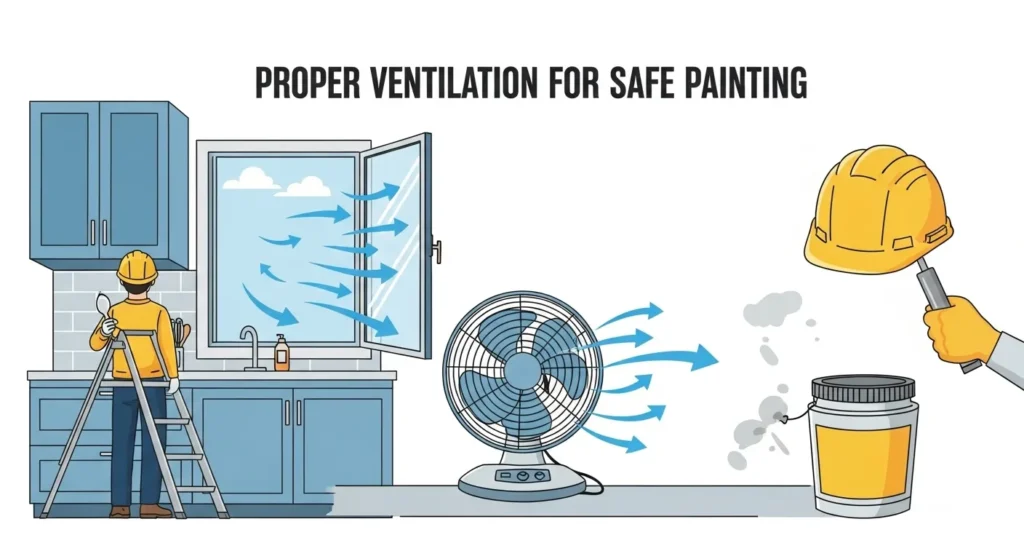
Practical Tips
- Ventilate during and after painting with open windows or a fan
- Avoid harsh cleaners in the first week while paint cures
- Choose EPA Safer Choice–certified products when possible
A few small decisions make your kitchen more comfortable while still delivering a durable finish.
Using low-VOC and EPA Safer Choice–certified primers can help protect indoor air quality during painting, as recommended by the Environmental Protection Agency.
Next Steps
Choosing the right paint finish and dedicating time to prep transforms your kitchen’s look and longevity. While costs vary, the payoff in durability and style makes it worthwhile.
Next steps:
- DIYers: Download a handy printable checklist to keep your project on track.
- Chula Vista residents: Book a free in-home consultation with Vexkitch to get expert guidance tailored to your kitchen.
Ready to refresh your kitchen the smart way? Let’s get started.