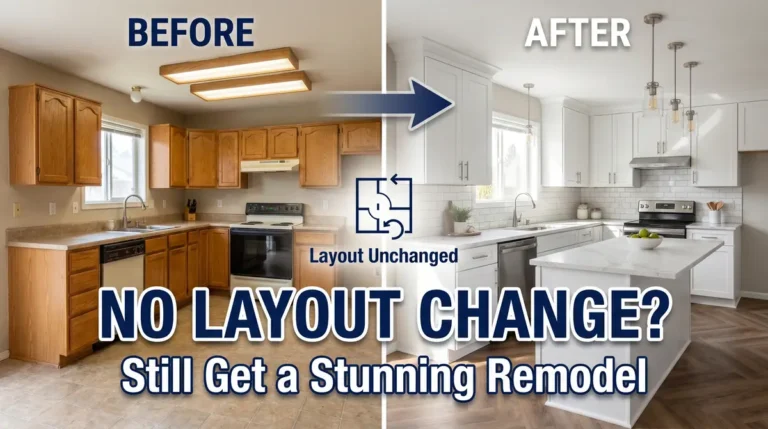
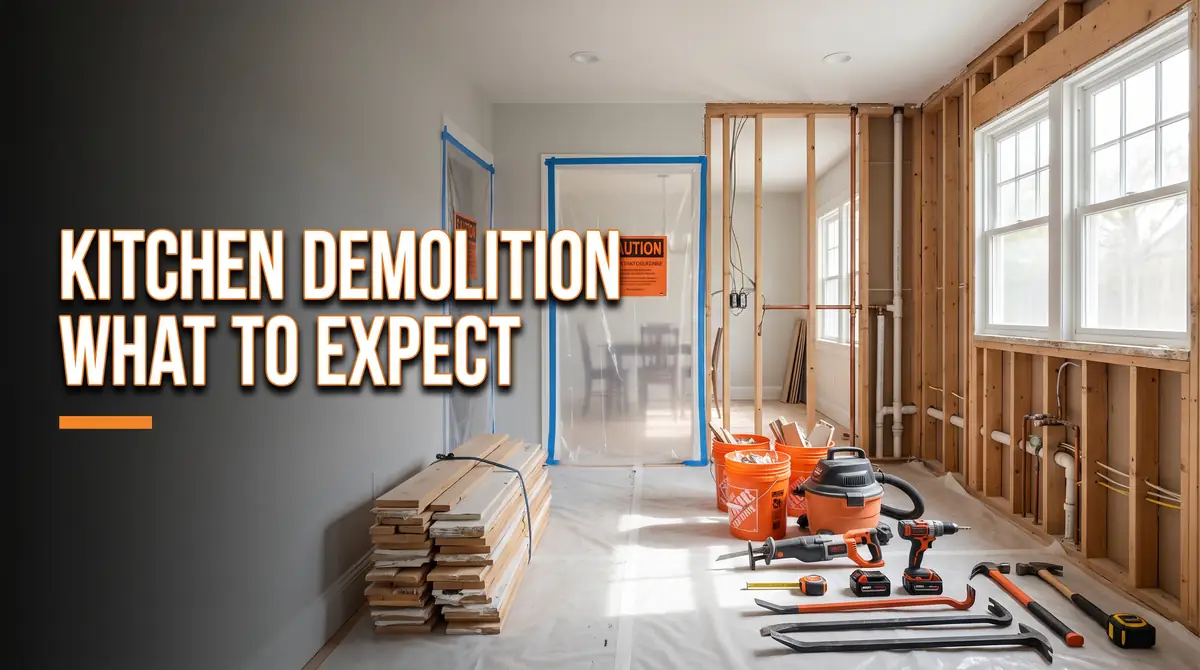
What to Expect During Kitchen Demolition Phase

Kitchen demolition is one of the most exciting milestones in a remodeling project because it’s the moment your old kitchen starts making way for something new.
At the same time, it can be noisy, dusty, and occasionally unpredictable. Knowing what happens before, during, and immediately after demolition helps you plan ahead and reduces unnecessary stress.
Updating cabinets, changing the layout, or planning a complete renovation, understanding the demolition process allows you to make informed decisions and avoid common surprises. For related planning, see Kitchen Remodeling Linda Vista, CA | Kitchen Renovation & in Design Services.
What Is Kitchen Demolition?
Kitchen demolition is the process of removing existing materials and fixtures to prepare the space for renovation. Depending on your project, demolition may include removing:
- Cabinets
- Countertops
- Flooring
- Backsplash
- Appliances
- Lighting fixtures
- Drywall For related planning, see Kitchen Wall Removal and Structural Work in Chula Vista.
- Plumbing fixtures
- Interior walls (when part of a layout change)
The scope of demolition depends on your remodeling goals. Replacing cabinets and countertops requires much less demolition than redesigning the kitchen layout or relocating plumbing and electrical systems.
Your planning to complete kitchen remodeling services in Chula Vista, demolition is the first construction phase that prepares your home for the new design.
Before Demolition Begins: How to Prepare Your Kitchen
Preparation makes the demolition process safer, cleaner, and more efficient. Taking a few steps before work starts can also help protect your belongings and reduce disruptions inside your home. For related planning, see HVAC upgrades for kitchen.
Finalize Your Remodeling Plan
Before any cabinets or countertops are removed, make sure your renovation plans are complete.
This includes:
- Finalizing the kitchen layout
- Selecting cabinets and countertops
- Choosing flooring and backsplash materials
- Confirming appliance locations
- Ordering materials before demolition begins
Having decisions made in advance helps prevent unnecessary delays once demolition is complete.
Remove Personal Belongings
Empty every cabinet, drawer, and pantry before the crew arrives.
Don’t forget to remove:
- Small appliances
- Cookware
- Food items
- Cleaning supplies
- Wall decorations
- Window treatments
Packing everything ahead of time protects your belongings from dust and accidental damage.
Set Up a Temporary Kitchen
Most homeowners underestimate how inconvenient it is to be without a working kitchen for several weeks.
A simple temporary kitchen can make daily life much easier.
Consider including:
- Microwave
- Coffee maker
- Mini refrigerator
- Electric kettle
- Portable induction cooktop
- Disposable plates and utensils
Meal planning before demolition can also reduce stress during construction.
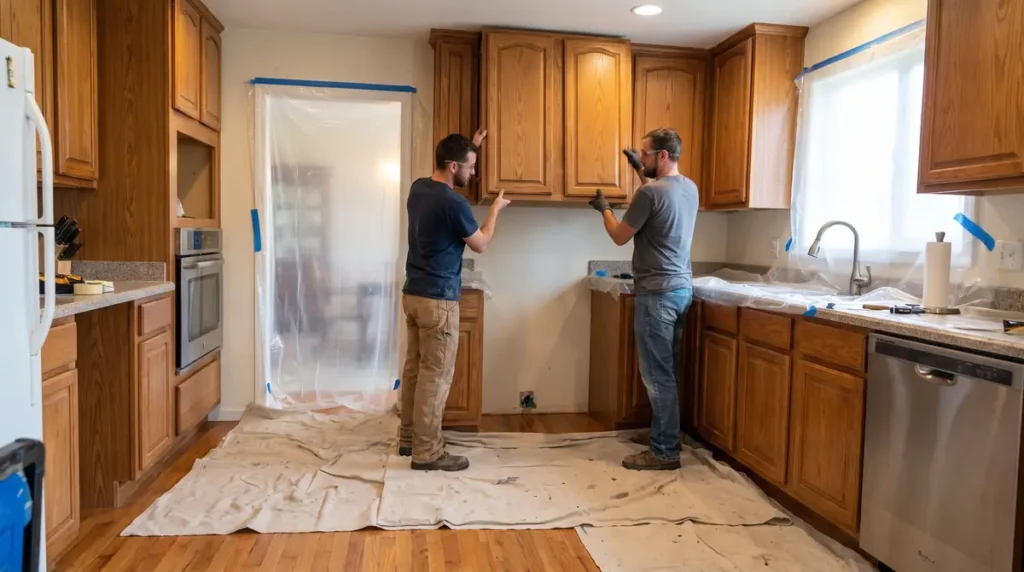
Protecting the Rest of Your Home
Kitchen demolition creates more dust than many homeowners expect. Even with professional containment systems, fine dust can travel through your home’s ventilation system if precautions aren’t taken.
Professional remodeling crews typically use:
- Plastic dust barriers
- Floor protection
- Sealed HVAC vents
- Zip-wall containment systems
- Daily debris removal
- Air filtration equipment on larger projects
If you’re living in your home during construction, keeping nearby rooms closed and removing valuable furniture from adjacent spaces can help minimize cleanup afterward.
Safety Preparations Before Demolition
Safety always comes before demolition begins.
Before removing any fixtures, contractors generally:
- Shut off the water supply
- Disconnect electrical circuits serving the kitchen
- Turn off gas lines when necessary
- Verify plumbing locations
- Protect nearby structural elements
Projects involving major layout changes may also require inspections or permits before demolition starts, particularly when walls, plumbing, or electrical systems are being modified.
If your remodel includes relocating sinks, dishwashers, or water lines, planning kitchen plumbing upgrades before demolition helps ensure the renovation progresses smoothly without unexpected utility conflicts.
What Happens During Kitchen Demolition?
Once preparation is complete, demolition usually follows a structured sequence. While every project is different, most kitchen demolitions move through similar stages.
Step 1: Removing Appliances
Large appliances are disconnected and removed first.
This may include:
- Refrigerator
- Range or cooktop
- Oven
- Dishwasher
- Microwave
- Range hood
Removing appliances first creates a safer workspace for the demolition crew.
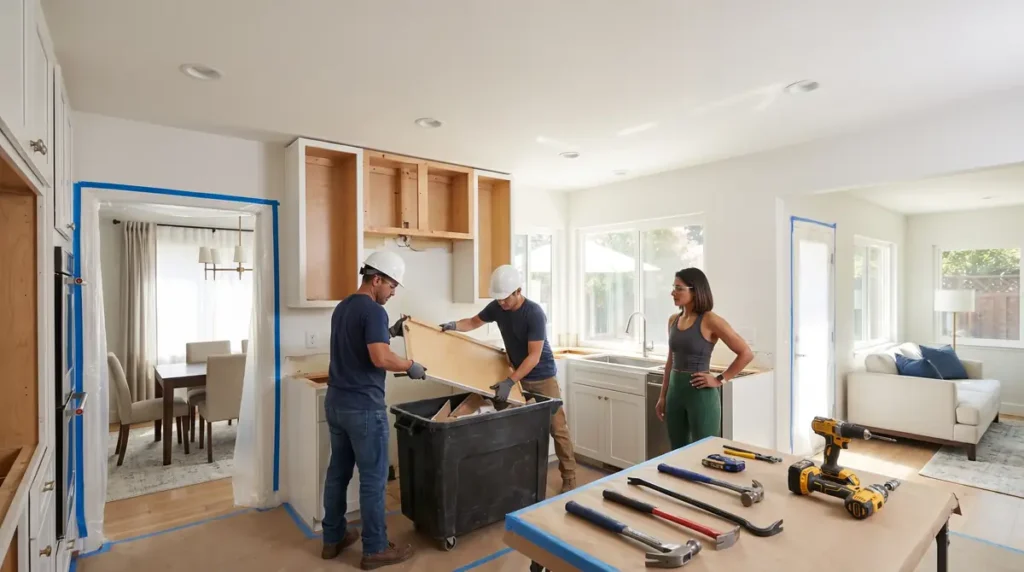
Step 2: Removing Cabinets
Upper cabinets are typically removed before lower cabinets.
Contractors carefully detach them from the wall while checking for hidden wiring, plumbing, or structural attachments.
If cabinets are still in good condition, they may be donated, recycled, or repurposed instead of discarded.
Step 3: Removing Countertops
Countertop removal depends on the material.
For example:
- Laminate countertops are usually removed in large sections.
- Quartz and granite require additional care because of their weight.
- Tile countertops are often removed piece by piece.
Protective equipment is especially important during this stage due to dust and sharp debris.
Step 4: Flooring and Backsplash Removal
Once cabinets are out of the way, crews remove flooring and wall finishes.
This may involve:
- Tile removal
- Hardwood flooring
- Vinyl flooring
- Backsplash tile
- Adhesive residue
At this point, the kitchen is stripped back to its structural shell, allowing contractors to inspect the underlying condition of the space.
How Long Does Kitchen Demolition Usually Take?
The demolition timeline depends on the size of the kitchen and the complexity of the remodel.
| Project Type | Typical Demolition Time |
|---|---|
| Cabinet replacement only | 1 day |
| Small kitchen remodel | 1–2 days |
| Standard full kitchen remodel | 2–4 days |
| Remodel involving structural wall removal | 3–5+ days |
Unexpected discoveries such as water damage, outdated electrical wiring, or plumbing issues can extend the schedule. However, identifying these problems early is often beneficial because they can be corrected before new materials are installed.
Many homeowners also use this stage to evaluate ways to improve their investment. If you’re considering upgrades beyond replacing finishes, our guide on what adds the most value in a kitchen remodel explains which improvements typically provide the greatest long-term return.
Hidden Problems That Are Often Discovered During Demolition
One of the biggest reasons demolition is an essential phase of a kitchen remodel is that it reveals the condition of the space behind your walls, cabinets, and flooring. While most projects move forward as planned, it’s not uncommon to uncover issues that weren’t visible before demolition.
Finding these problems early gives you the opportunity to address them before new cabinets, countertops, and finishes are installed.
Some of the most common discoveries include:
- Water damage behind sinks or dishwashers
- Mold caused by long-term moisture exposure
- Outdated electrical wiring
- Aging or leaking plumbing
- Uneven or damaged subfloors
- Termite or pest damage
- Improper repairs from previous renovations
- Hidden structural issues inside walls
Although unexpected repairs can affect your budget and schedule, fixing them now helps protect your investment and prevents more expensive repairs in the future.
Managing Dust, Noise, and Daily Disruptions
Kitchen demolition is one of the loudest and messiest stages of a remodeling project. Planning ahead makes it easier to continue your daily routine while work is underway.
Here’s what you can expect:
Dust
Even with professional containment systems, demolition creates a significant amount of dust.
Contractors often reduce dust by using:
- Plastic containment walls
- Floor protection
- Covered HVAC vents
- HEPA air filtration equipment
- Daily site cleanup
Homeowners can also help by closing nearby rooms and removing valuable electronics or furniture from adjacent areas.
Noise
Expect loud sounds from:
- Pry bars
- Hammers
- Tile removal
- Power saws
- Drills
If you work from home or have young children or pets, you may want to arrange alternative accommodations during the busiest demolition days.
Limited Kitchen Access
Once demolition begins, your kitchen will no longer be functional.
Plan for:
- Preparing meals elsewhere
- Eating out occasionally
- Using your temporary kitchen
- Storing essential food items outside the work area
Thinking through these details before demolition begins can make the remodeling process much less stressful.
Can Anything Be Saved During Demolition?
Not everything removed from your kitchen has to end up in a landfill.
Depending on its condition, many items can be reused, donated, or recycled.
Items that may be salvageable include:
- Cabinets
- Cabinet hardware
- Faucets
- Light fixtures
- Appliances
- Doors
- Shelving
- Trim
Some homeowners choose to donate reusable materials to local organizations or building reuse centers, while others sell higher-value items before demolition starts.
If your cabinets are structurally sound but you’re looking for a fresh appearance, keeping certain components may also reduce remodeling costs.
Common Kitchen Demolition Mistakes to Avoid
Handling part of the project yourself or hiring professionals, avoiding these common mistakes can save both time and money.
Starting Before Materials Arrive
Beginning demolition before cabinets, flooring, or countertops have been delivered can leave your home without a usable kitchen for much longer than expected.
Whenever possible, have major materials on-site or confirmed before demolition starts.
Forgetting Utility Shutoffs
Water, electricity, and gas should always be disconnected before fixtures are removed. For related planning, see Kitchen Remodeling Services in National City, CA.
Attempting demolition without proper utility shutoffs can create serious safety risks.
Damaging Reusable Materials
If you plan to reuse appliances, cabinets, or fixtures, removing them carefully helps prevent unnecessary damage.
Labeling hardware and storing components properly can also simplify reinstallation if applicable.
Ignoring Hidden Damage
Trying to cover water damage, mold, or outdated wiring instead of repairing it often leads to more expensive problems later.
Addressing issues during demolition is usually more cost-effective than reopening finished walls after the remodel is complete.
Underestimating Debris Removal
Kitchen demolition produces far more debris than many homeowners expect.
Old cabinets, drywall, flooring, tile, countertops, and packaging materials require organized disposal throughout the project.
Professional crews typically include debris removal as part of the demolition process, helping keep the work area clean and safe.
What Happens After Demolition?
Once demolition is complete, your kitchen enters the rebuilding phase.
Most remodeling projects follow this sequence:
- Inspect the exposed structure.
- Complete any necessary structural repairs.
- Install or relocate plumbing lines.
- Complete electrical rough-in work.
- Update HVAC systems if required.
- Install drywall and prepare surfaces.
- Install flooring (depending on the project sequence).
- Install cabinets.
- Measure and install countertops.
- Complete backsplash installation.
- Install lighting, plumbing fixtures, and appliances.
- Perform final inspections and walkthrough.
Understanding these next steps helps homeowners see demolition as just one milestone in the overall renovation process rather than the most disruptive part.
Many projects also include improvements such as custom cabinetry solutions, upgraded storage, and modern countertop materials once the space has been fully prepared.

Kitchen Demolition Safety Tips
Working with a contractor or tackling part of the demolition yourself, safety should always be the top priority. Demolition involves heavy materials, sharp edges, dust, and hidden utilities that can pose risks if not handled correctly.
Follow these basic safety practices:
- Wear safety glasses, gloves, and sturdy footwear.
- Use hearing protection when power tools are operating.
- Keep children and pets away from the work area.
- Shut off water, electricity, and gas before removing fixtures.
- Use ladders safely when removing upper cabinets.
- Lift heavy countertops with enough people to avoid injury.
- Keep walkways clear of debris to prevent trips and falls.
For homes built decades ago, it’s also important to consider the possibility of hazardous materials such as asbestos or lead-based paint. If you suspect either may be present, have the materials evaluated before demolition begins.
Should You DIY or Hire a Professional?
Many homeowners consider handling demolition themselves to reduce remodeling costs. While removing cabinets or flooring may seem straightforward, some parts of demolition require experience and specialized knowledge.
DIY May Be Suitable For
- Removing cabinet doors
- Clearing out the kitchen
- Taking down simple shelving
- Removing laminate countertops
- Cleaning the space after demolition
Professional Demolition Is Recommended For
- Structural wall removal
- Plumbing modifications
- Electrical work
- Gas line disconnections
- Heavy stone countertops
- Permit-required projects
Professional crews also know how to minimize damage to surrounding walls and floors, dispose of debris efficiently, and keep the project moving on schedule.
Frequently Asked Questions
How do I prepare my home before kitchen demolition?
Remove all personal belongings, pack pantry items, disconnect small appliances, and set up a temporary kitchen. It’s also a good idea to protect nearby furniture and discuss the demolition schedule with your contractor so you know what to expect each day.
How messy is kitchen demolition?
Demolition creates dust, debris, and noise, but experienced remodeling teams use containment barriers, floor protection, and daily cleanup practices to reduce the impact on the rest of your home.
Can I stay in my house during kitchen demolition?
Yes, many homeowners remain in their homes during demolition. However, you’ll need an alternative cooking area, and you should be prepared for temporary inconvenience from noise and limited access to your kitchen.
What hidden problems are commonly found during demolition?
Some of the most common discoveries include water damage, mold, outdated plumbing, aging electrical wiring, uneven flooring, and structural repairs that weren’t visible before cabinets and drywall were removed.
Do I need permits before demolishing a kitchen?
Permit requirements depend on the scope of your remodel. Cosmetic updates may not require permits, while projects involving structural changes, electrical work, plumbing relocation, or gas lines often do. Your remodeling contractor can advise you based on local building requirements.
How long will I be without a working kitchen?
Most homeowners are without a fully functional kitchen for several weeks during a complete remodel. The exact timeline depends on the size of the project, material availability, inspections, and any unexpected repairs are discovered after demolition.
Planning a Kitchen Remodel in Chula Vista?
Kitchen demolition is more than simply tearing out cabinets—it’s the foundation for a successful renovation. Careful planning, proper preparation, and addressing hidden issues early can help your project stay on schedule while protecting the quality of the finished kitchen.
If you’re ready to transform your space, explore our complete kitchen remodeling services in Chula Vista to learn how we guide homeowners through every stage of the remodeling process, from demolition and design to installation and the final walkthrough.