
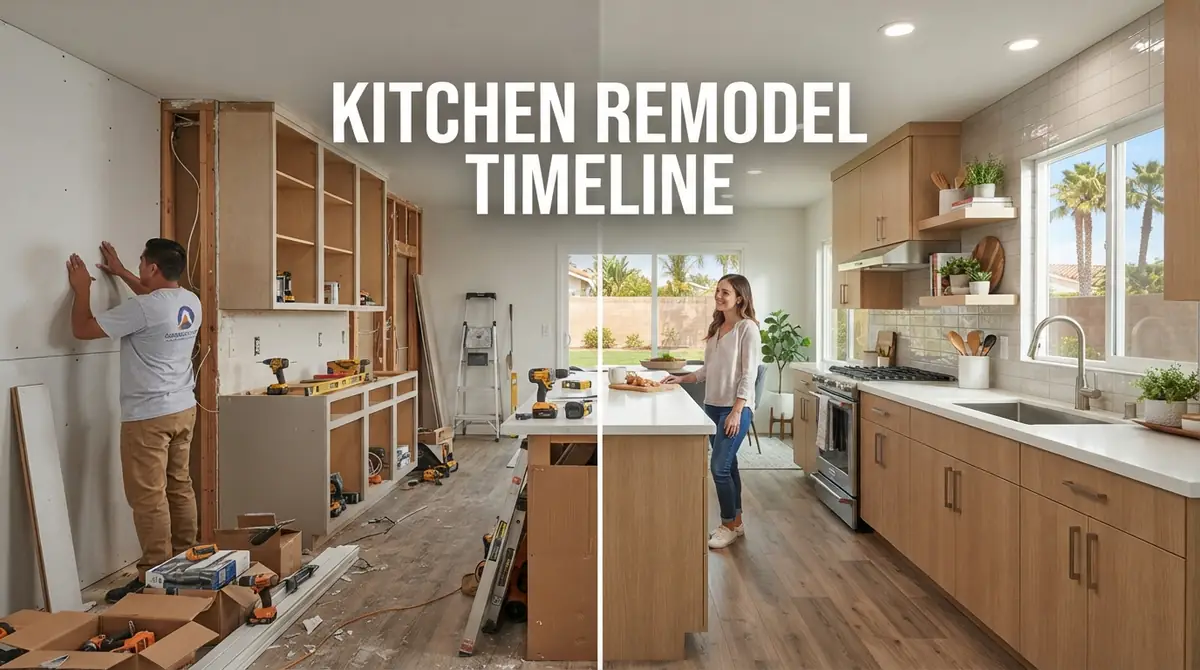
Kitchen Remodel Timeline in Chula Vista: Week-by-Week Guide

A kitchen remodel can involve weeks or months of planning, ordering, construction, and finishing. The part homeowners feel most, though, is the period between demolition and getting the sink, countertops, and major appliances working again. For related planning, see What to Expect During Kitchen Demolition Phase.
For Chula Vista homeowners, a realistic kitchen remodel timeline needs to account for more than construction labor. Design decisions, cabinet lead times, permit review when required, inspections, countertop fabrication, and trade sequencing can all affect the calendar.
The timeline below separates the total project timeline from the time your kitchen may actually be out of service. For related planning, see Chula Vista ADU Kitchen Requirements.
How Long Does a Kitchen Remodel Take?
A cosmetic kitchen update may involve only a few weeks of active work, while a full renovation with cabinets, countertops, plumbing, electrical work, or layout changes can take considerably longer. Planning, material ordering, permits when required, and inspections may add time before and during construction. For related planning, see Kitchen Sink Installation Cost in Chula Vista.
| Remodel Scope | Example Active Construction | Main Timeline Variables |
|---|---|---|
| Cosmetic update | 1–3 weeks | Product availability and minor trade work |
| Same-layout remodel For related planning, see Kitchen Island Size & Clearance Guide. | 4–8+ weeks | Cabinets, counters, flooring, appliances For related planning, see Moody Blue Kitchen Cabinets. |
| Full remodel | 8–14+ weeks | Multiple trades, inspections, fabrication |
| Structural/layout remodel | 12–20+ weeks | Plans, utility relocation, permits, structural work |
These are planning ranges rather than promised completion times. Each project should be scheduled around its actual scope and materials. For related planning, see Range Hood Installation Cost in Chula Vista in Should Expect.
Kitchen Remodel Timeline at a Glance
A useful way to understand the schedule is to divide it into two parts.
Total Project Timeline
This may include:
- Consultation and measurements
- Layout and design decisions
- Appliance specifications
- Cabinet and material ordering For related planning, see Cabinet Refacing vs. Replacing.
- Permit review when required
- Construction
- Final corrections and walkthrough
Much of this can happen while the existing kitchen still works. For related planning, see How Much Does It Cost to Move a Kitchen.
How Long Will Your Kitchen Actually Be Unusable?
The biggest disruption normally begins when demolition starts.
| Stage | Typical Kitchen Status |
| Design and selections | Usable |
| Material ordering | Usable |
| Permit processing | Usually usable |
| Demolition | Unusable |
| Rough plumbing/electrical | Unusable |
| Cabinet installation | Limited |
| Countertop fabrication | Limited |
| Fixtures and appliances | Gradually returning to use |
| Punch list | Mostly usable |
This distinction matters when planning meals, family routines, work-from-home schedules, and temporary food preparation. For related planning, see HVAC upgrades for kitchen.
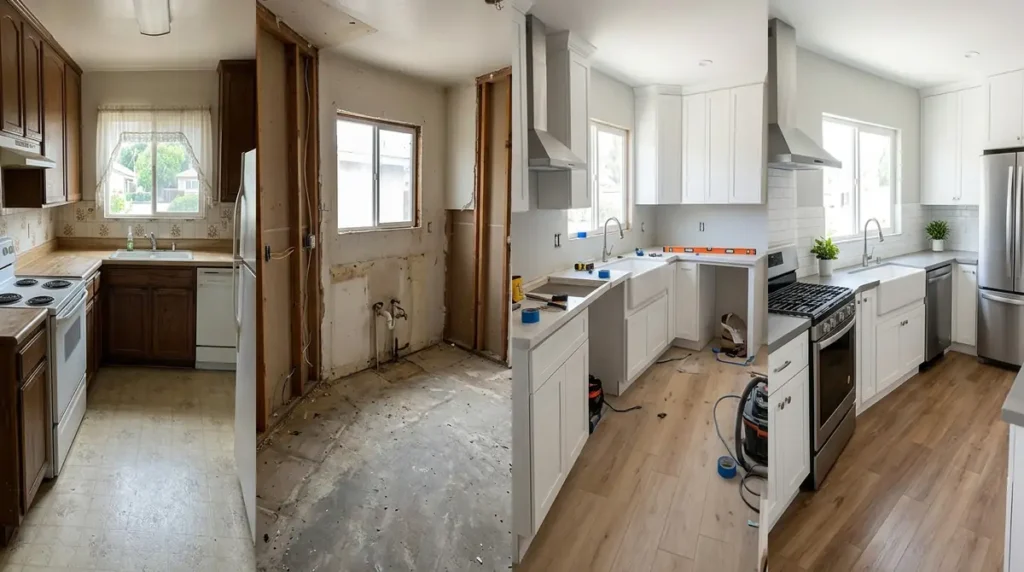
Before Week 1: Planning the Remodel
Good scheduling starts before the first cabinet comes off the wall.
Finalize the Kitchen Layout
Decide the locations of major components early:
- Sink
- Dishwasher
- Refrigerator
- Range
- Range hood
- Kitchen island
- Lighting
- Electrical outlets
Moving one component may affect several trades. Relocating a sink, for example, may affect plumbing, cabinets, countertops, flooring, and potentially the permit scope. For related planning, see how to clean kitchen cabinets grease Fast and Safely.
Homeowners making broader functional changes can review Vexkitch’s kitchen upgrades for homeowners before locking in the new layout.
Confirm Appliance Specifications
Cabinet plans should account for actual appliance dimensions rather than rough assumptions.
Confirm:
- Width and depth
- Door clearances
- Electrical requirements
- Water connections
- Ventilation needs
- Built-in installation requirements
Changing appliance sizes after cabinetry has been ordered can create avoidable corrections.
Order Long-Lead Materials Early
Cabinets are often one of the most schedule-sensitive products, but appliances, specialty tile, fixtures, and flooring can also affect the start date.
A useful priority is:
- Cabinets
- Major appliances
- Specialty fixtures
- Flooring and tile
- Hardware and finish materials
Budget decisions should also be settled before construction. Our guide to estimating your kitchen renovation budget can help organize those decisions before work begins.
Is Your Kitchen Ready for Demolition?
Before removing the existing kitchen, confirm that:
- The layout is approved
- Cabinet specifications are finalized
- Appliance dimensions are confirmed
- Required permit steps have been addressed
- Major finish materials are selected
- Critical product lead times are known
- A temporary kitchen area is prepared
Demolition is easy to start. The harder part is making sure the project can continue productively afterward.
Where Chula Vista Permits Fit Into the Timeline
Permit requirements depend on the scope of work. Structural changes, plumbing relocation, electrical modifications, and mechanical work may require review or inspection.
The City of Chula Vista currently lists a 15-business-day goal for the first review of Residential Addition-Remodel plans and a 10-business-day goal for rechecks or plan changes. These are general review goals, not guaranteed turnaround times, and incomplete submissions can extend the process. For related planning, see Kitchen Remodeling Services in National City, CA.
Projects involving work that may require City review should account for kitchen remodeling permits in Chula Vista before setting a firm demolition date.
Week 1: Demolition and Site Preparation
Once demolition begins, the kitchen usually becomes the least usable.
Work may include:
- Protecting adjacent rooms
- Disconnecting appliances
- Removing cabinets
- Removing countertops
- Removing flooring where required
- Opening drywall for utility work
- Clearing debris
Demolition can also reveal conditions that were hidden before construction, such as water-damaged material, subfloor deterioration, older wiring, or unexpected plumbing configurations.
Those discoveries do not occur on every project, but the schedule should allow room to address them properly if found.
Weeks 1–2: Framing, Plumbing and Electrical Rough-In
Layout changes become physical during the rough-in phase.
Plumbing may need adjustment for sinks, dishwashers, refrigerator water lines, or other fixtures. Electrical work may include appliance circuits, outlets, lighting, switches, and ventilation equipment.
The sequence matters:
Walls opened → rough work completed → required inspection → walls closed
Work cannot always move to the next phase simply because another trade is available.
Weeks 2–3: Inspections, Drywall and Wall Preparation
Required inspections can sit directly between rough work and drywall.
Chula Vista advises that inspections are limited each day. Requests made after daily capacity is reached may be scheduled for the next available business day. For related planning, see Kitchen Remodeling Linda Vista, CA | Kitchen Renovation & in Design Services.
A small scheduling change at this point can affect later work because drywall, cabinets, or other finishes may depend on the previous phase being approved.
After the necessary rough work is complete, the walls can be patched or rebuilt, textured where appropriate, and prepared for finishing.
Weeks 3–5: Flooring and Cabinet Installation
Cabinet installation is one of the biggest milestones in a remodel.
Once cabinets are accurately positioned, several parts of the kitchen become fixed:
- Appliance openings
- Island location
- Sink position
- Storage layout
- Final countertop dimensions
Flooring may be installed before or after cabinetry depending on the flooring system, manufacturer requirements, transitions, and overall design. There is no single sequence that fits every kitchen.
Weeks 5–7: Countertop Template, Fabrication and Installation
This phase surprises many homeowners.
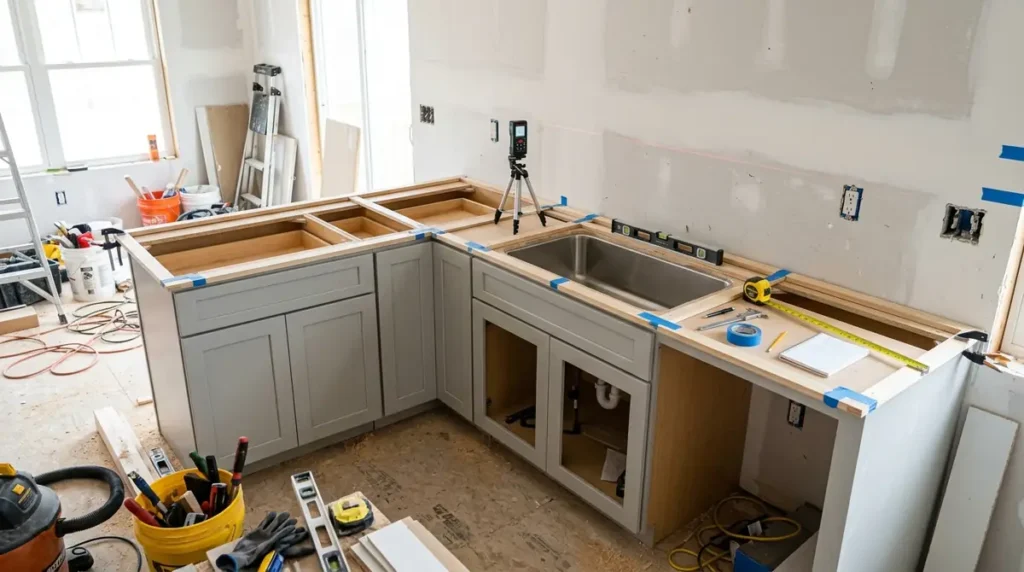
Cabinets may be installed and the kitchen may look close to finished, but the room can still lack a functioning sink and usable work surfaces. For related planning, see Dark Cottagecore Kitchen.
A common sequence is:
Cabinets installed → countertop template → fabrication → countertop installation → sink and faucet connections
Accurate field measurements typically depend on the cabinets being installed in their final positions.
That creates a period when the room looks much further along than it functions.
Weeks 6–8+: Backsplash, Fixtures and Appliances
The kitchen starts returning to service as the finish components come together.
Work can include:
- Countertop completion
- Sink and faucet connections
- Backsplash installation
- Lighting
- Outlets and switch plates
- Appliance installation
- Cabinet hardware
- Trim
- Paint touchups
Small corrections can still take several days. Cabinet doors may need adjustment, hardware may be missing, appliance panels may need alignment, and finish details may require another visit.
Final Inspection, Punch List and Walkthrough
The final stage is more than cleaning the room.
Depending on the project, it may include:
- Required final inspection
- Functional checks
- Finish review
- Corrections
- Cleanup
- Homeowner walkthrough
A project is better measured by completed work than by how close the room appears to completion.
The Kitchen Remodel Delay Domino Effect
Kitchen remodeling stages are connected. One delay can move several tasks behind it.
Example: Cabinets Arrive Late
Cabinet delivery moves
→ Cabinet installation moves
→ Countertop templating moves
→ Fabrication moves
→ Sink connection moves
→ Kitchen downtime increases
Example: Appliance Size Changes
Different appliance selected
→ Cabinet opening changes
→ Installation details change
→ Cabinet or finish corrections may be required
Example: Inspection Schedule Changes
Rough inspection moves
→ Wall closure moves
→ Following finish work may move
This dependency chain is why the fastest remodel is not necessarily the one with the most workers. A coordinated sequence matters more.
What Can Make a Kitchen Remodel Take Longer?
Common schedule risks include:
- Changing the layout during construction — A new decision may affect several completed or scheduled trades.
- Late cabinet delivery — Cabinets often sit near the center of the installation sequence.
- Incorrect or damaged materials — Replacements can interrupt planned installation dates.
- Countertop fabrication — Final fabrication generally follows installed cabinet measurements.
- Permit corrections — Revised plans may require another review cycle.
- Inspection scheduling — Dependent work may need to wait for approval.
- Hidden conditions — Problems behind walls or under floors can require repair.
- Mid-project material changes — New selections may have different sizes, lead times, or installation requirements.
Calendar Time Is Not the Same as Work Time
A remodeling schedule contains more than labor hours.
Some days may be used for:
- Fabrication
- Inspections
- Material deliveries
- Drying or curing
- Trade coordination
- Required corrections
A day without a crew physically working in the kitchen does not automatically mean the project has stalled. The important question is whether the next dependent step is moving forward as scheduled.
How to Reduce Kitchen Downtime
Reducing disruption is usually about eliminating avoidable gaps rather than rushing construction.
Before demolition:
- Lock in the layout
- Confirm appliance specifications
- Order schedule-sensitive materials
- Make major finish decisions
- Account for permit review where required
- Build inspection time into the schedule
- Avoid unnecessary design changes once construction begins
Careful preconstruction planning gives each trade a clearer path to the next stage.
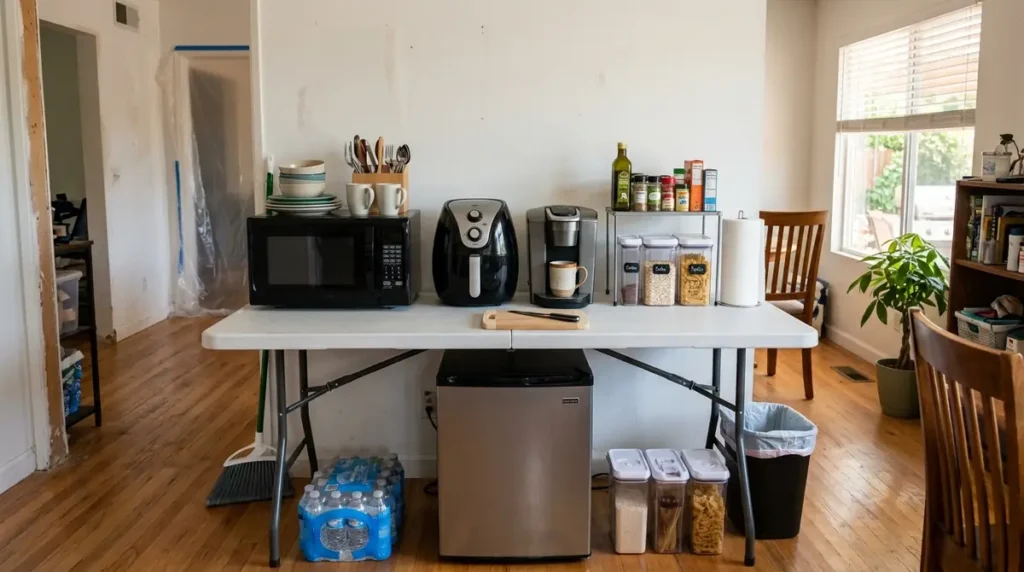
Set Up a Temporary Kitchen Before Demolition
A simple temporary kitchen can make several weeks of disruption easier to manage.
Useful items may include:
- Microwave
- Air fryer or toaster oven
- Coffee maker
- Small refrigerator
- Folding prep table
- Basic plates and utensils
- Food-storage containers
Plan for water access too. Losing the kitchen sink can be more disruptive than losing the range because washing dishes, filling containers, cleaning food, and general cleanup all need a temporary solution.
Want the Remodel Finished by a Specific Date? Work Backward
A holiday, family visit, or move-in date changes how the project should be scheduled.
Do not simply subtract eight weeks from the desired completion date.
Work backward through:
- Final walkthrough and corrections
- Fixture and appliance completion
- Countertop installation
- Countertop fabrication
- Cabinet installation
- Drywall and rough work
- Demolition
- Permit requirements
- Material and cabinet lead times
- Final design approval
Add schedule flexibility around important events. A projected completion date is easier to manage when there is room for normal construction dependencies.
Sample Chula Vista Kitchen Remodel Timeline
| Phase | Example Timing | Kitchen Status |
| Design and planning | Preconstruction | Usable |
| Permits and ordering | Preconstruction | Usually usable |
| Demolition | Week 1 | Unusable |
| Rough trades | Weeks 1–2 | Unusable |
| Inspection and drywall | Weeks 2–3 | Unusable |
| Cabinets and flooring | Weeks 3–5 | Limited |
| Countertops | Weeks 5–7 | Limited |
| Fixtures and appliances | Weeks 6–8+ | Returning to use |
| Punch list | Final stage | Mostly usable |
Actual timing varies with the remodel scope, material availability, required reviews and inspections, design changes, and site conditions.
Frequently Asked Questions
How long does a kitchen remodel take in Chula Vista?
A kitchen remodel may require several weeks of active construction, while a project involving structural work, major layout changes, multiple trades, or longer material lead times can take considerably longer. Planning, ordering, permitting when required, and final corrections also contribute to the total project timeline.
How long will I be without a working kitchen?
The kitchen is usually most disrupted from demolition through countertop, sink, and appliance installation. Design, material ordering, and many preconstruction tasks can often happen while the original kitchen is still usable.
Can a kitchen remodel be completed in four weeks?
A limited cosmetic project or carefully planned same-layout renovation may have a shorter construction schedule. A full remodel involving cabinets, countertops, utility relocation, inspections, or structural changes generally requires more time.
What part of a kitchen remodel usually takes the longest?
There is no single longest phase for every project. Cabinet lead times may dominate preconstruction, while trade sequencing, inspections, and countertop fabrication can create important dependencies during active construction.
When should kitchen cabinets be ordered?
Cabinets should be ordered after the layout, measurements, appliance requirements, and major cabinet specifications are sufficiently finalized. Ordering them well before demolition can reduce the risk of leaving the kitchen unusable while waiting for cabinetry.
Do permits add time to a Chula Vista kitchen remodel?
They can when the project scope requires City review or inspections. Chula Vista currently publishes review goals for residential addition-remodel plans, so permit time should be considered before committing to a demolition or completion date.
Should countertops be ordered before cabinets are installed?
The material and design can be selected earlier, but final field templating typically depends on cabinets being installed accurately in their final positions. Fabrication and installation then follow the completed measurements.
Can you live at home during a kitchen remodel?
Many homeowners remain in their homes during remodeling, but comfort depends on the project scope, dust control, temporary utility interruptions, household needs, and access to another area for food preparation and cleanup.
Planning a Kitchen Remodel in Chula Vista?
A realistic schedule starts before demolition. Layout decisions, material lead times, permit requirements, inspections, and trade sequencing all affect how long the kitchen stays out of service.
Vexkitch Kitchen Remodeling has served remodeling clients since 2017, with 700+ completed projects and four full-time remodeling crews. Explore our complete kitchen remodeling services in Chula Vista to plan the scope and sequence of your project, or contact Vexkitch Kitchen Remodeling to discuss your renovation.